Create an Agent
Ways to Create an Agent
You can create an Agent using the following methods:
- Standard Creation: Suitable for beginner users, simple and quick to operate.
- Workflow Creation: Supports configuring more complex business logic, suitable for advanced use cases.
- Share Code Creation: Allows you to directly copy an existing Agent and quickly reuse its configuration.
💡 Tip: Please ensure you have the necessary permissions to create an Agent before proceeding.
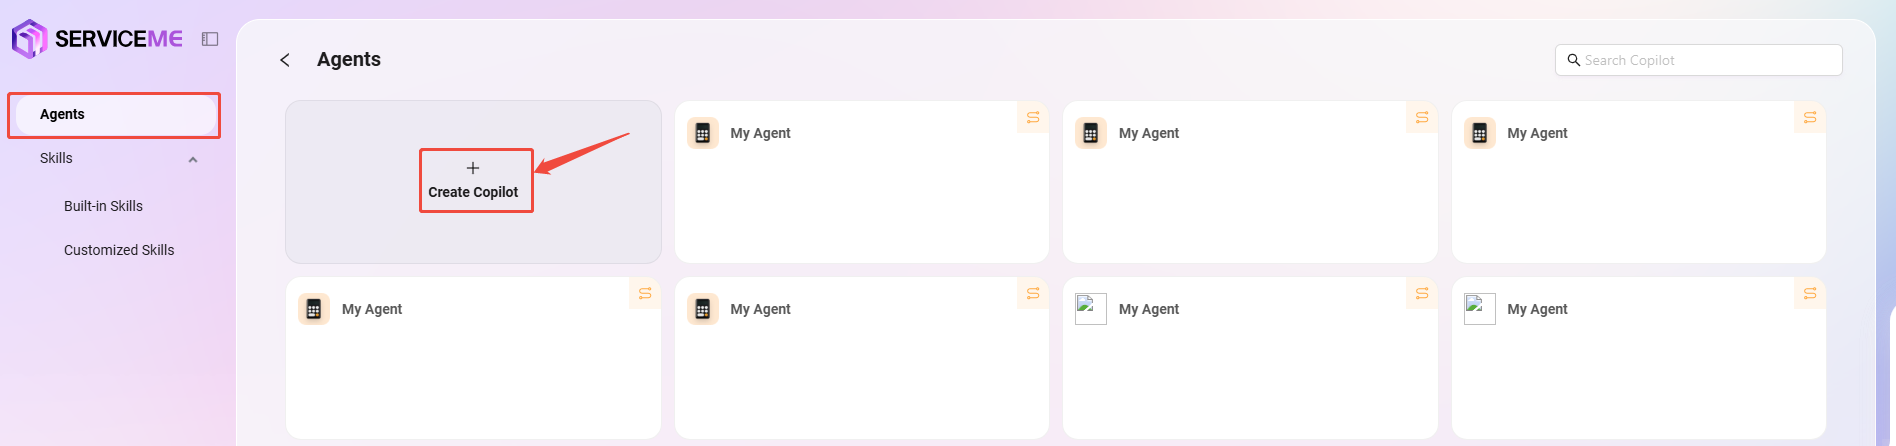
Entry Points for Creating an Agent (Both Quick Entry Points Are Available)
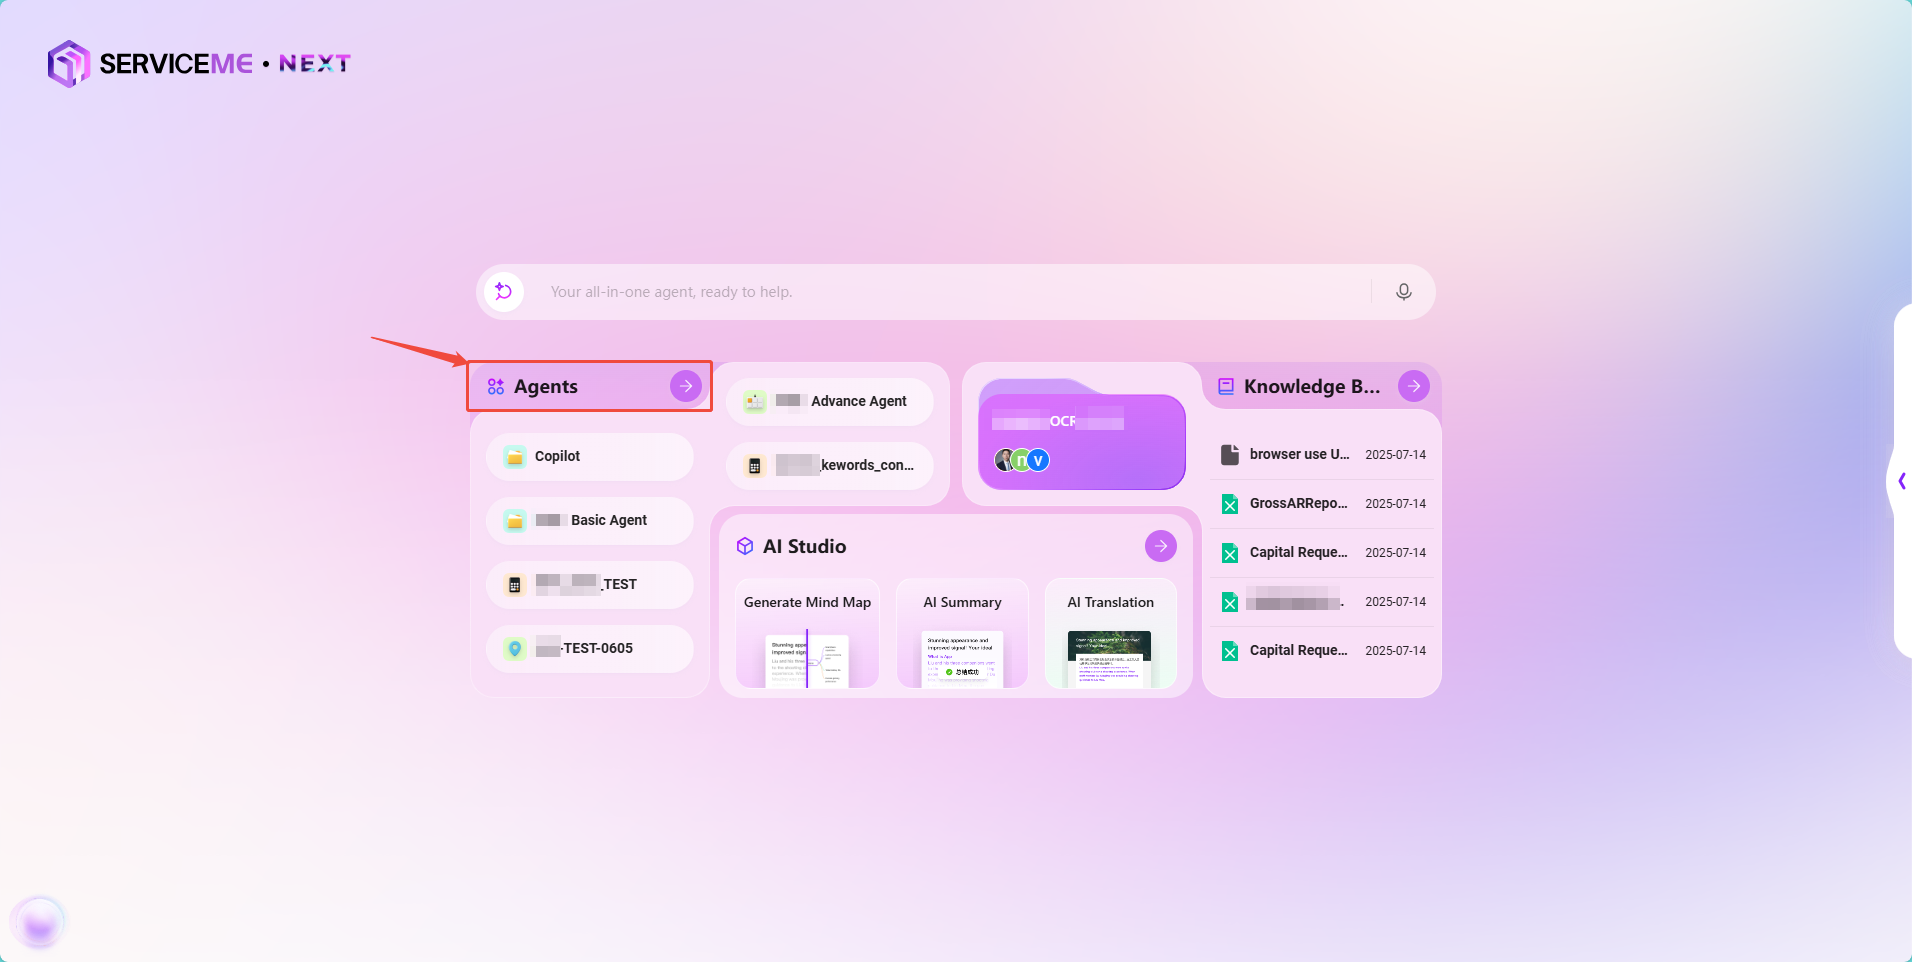
- Entry 1:
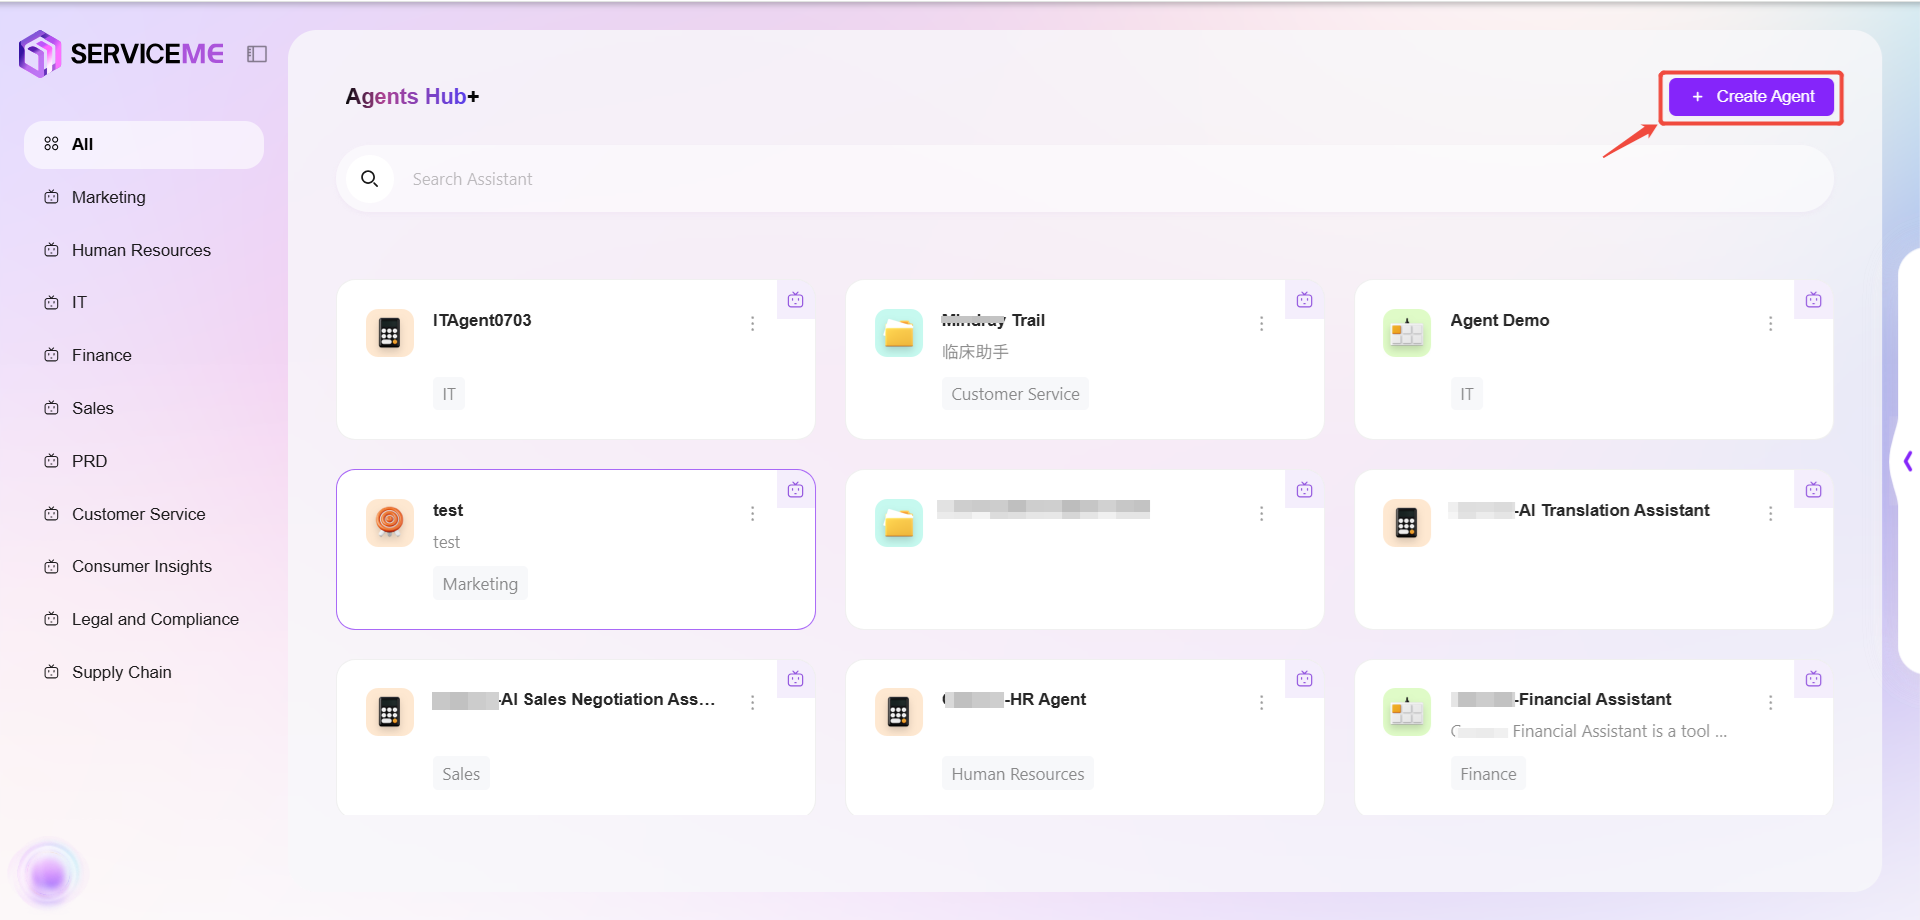
Agent→Create Agent
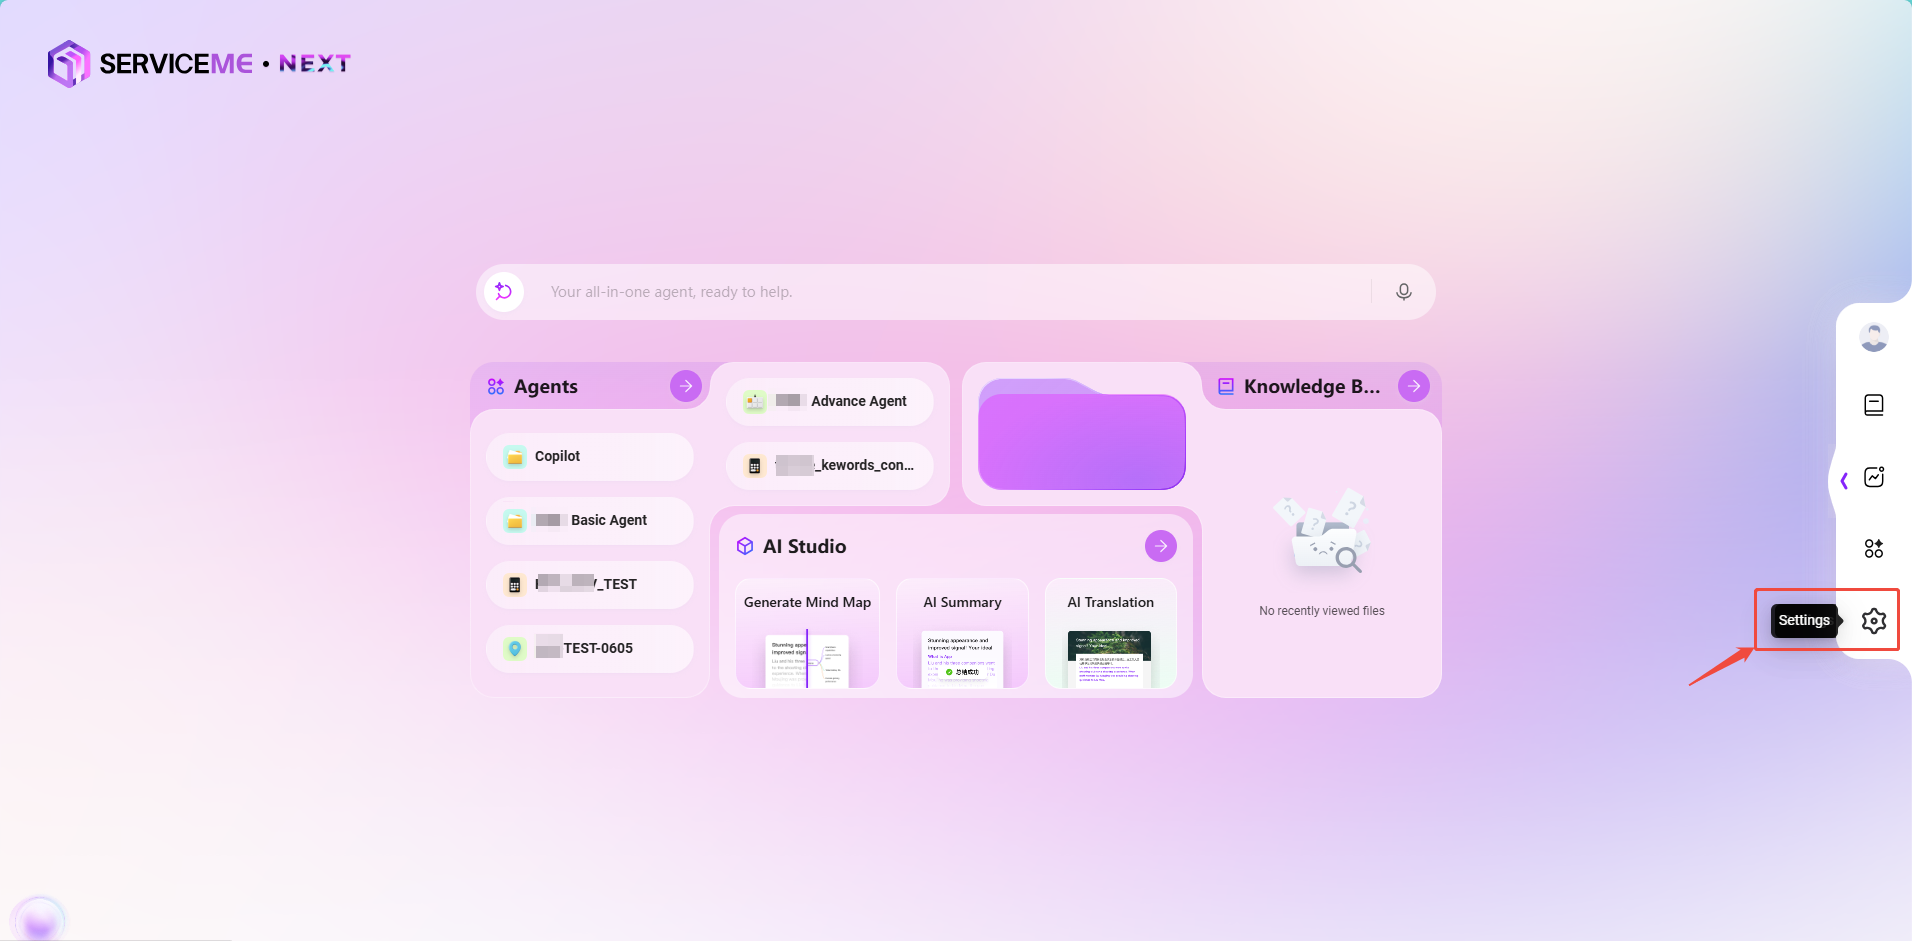
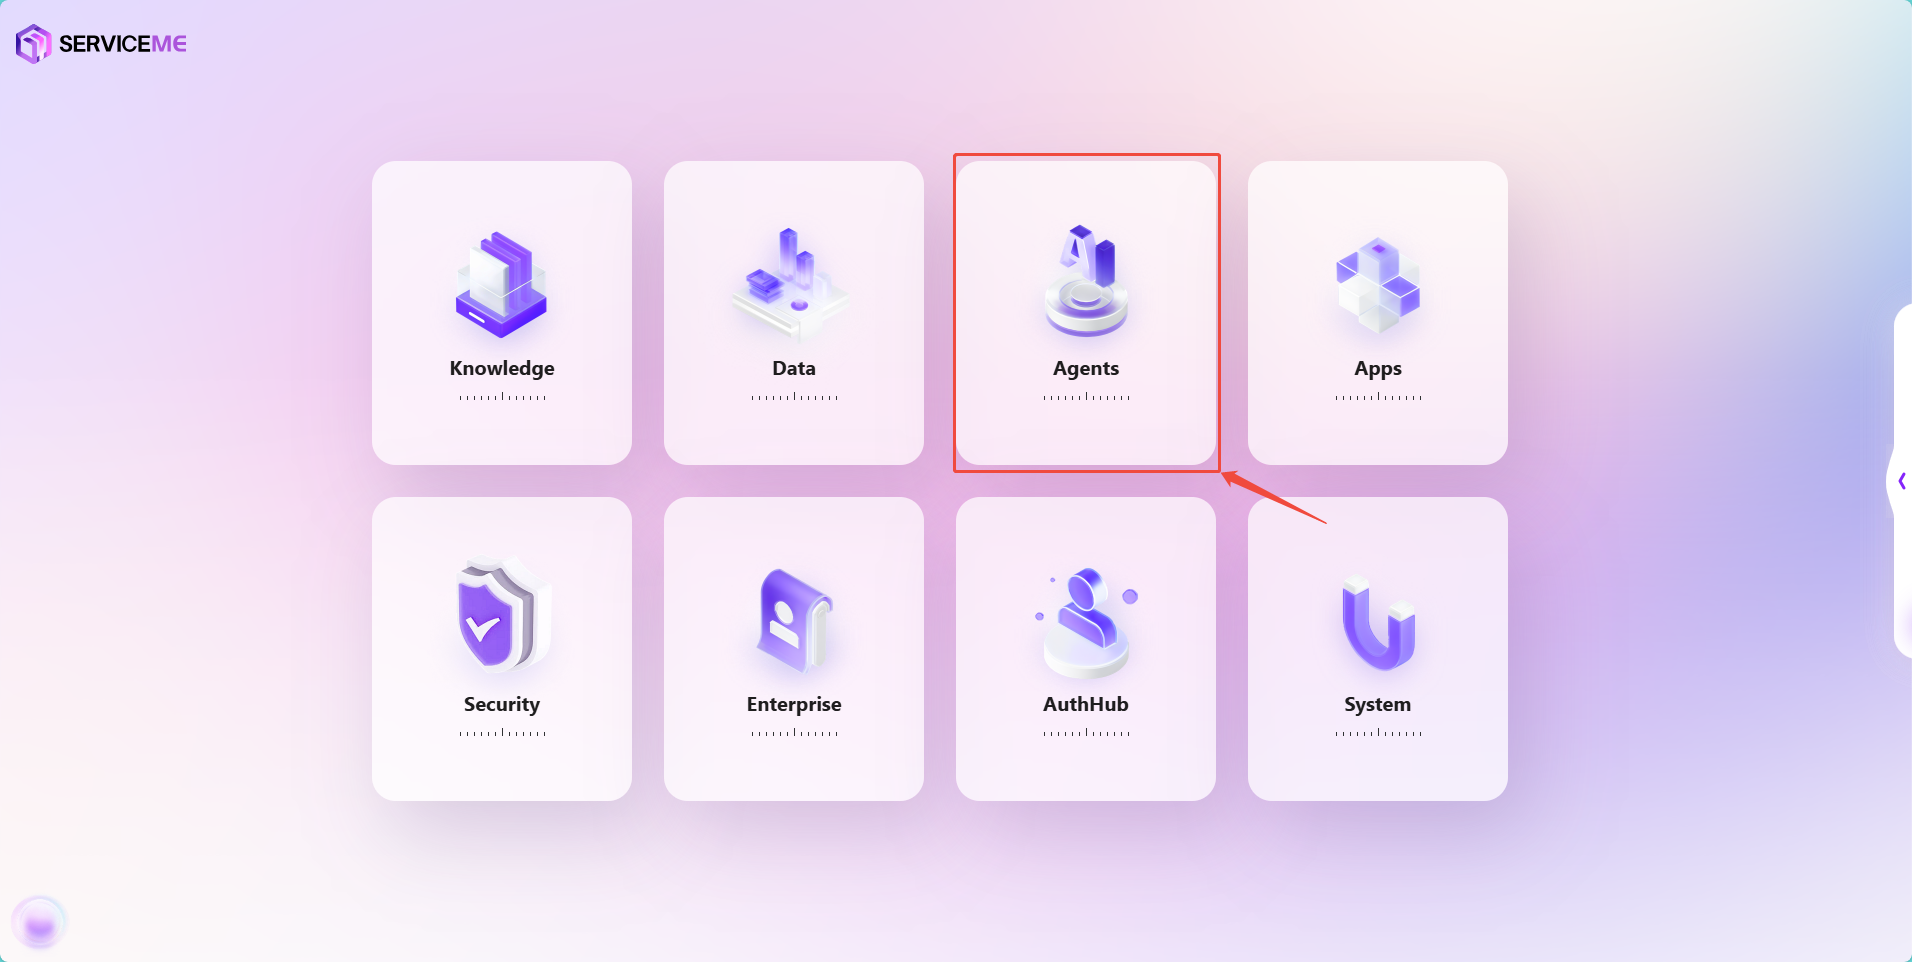
- Entry 2:
Settings→Agent→Create Agent
Standard Creation - Basic Agent
1. Select "Basic Agent"
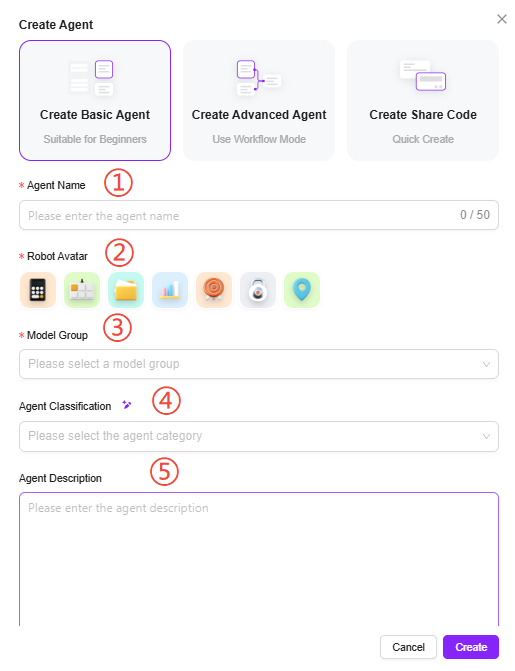
2. Creation Steps
- After clicking "Create Agent" from the entry point, select "Basic Orchestration Creation"
- Enter the Agent name, select an avatar, choose a model group, select a category, and add a description:
① Agent Name: Enter the name of the Agent, which will serve as its identifier.
② Agent Avatar: Select the default avatar for the Agent; uploading custom avatars is not supported at this time.
③ Model Group: Configure an appropriate model group for the Agent.
④ Agent Description: Enter a brief description explaining the Agent's functions and use cases.
⑤ Agent Category: Select the group(s) to which the new Agent belongs; multiple selections are allowed. - Click "Create". After creation, you will enter the basic orchestration Agent configuration page. Configure and publish to start using the Agent.
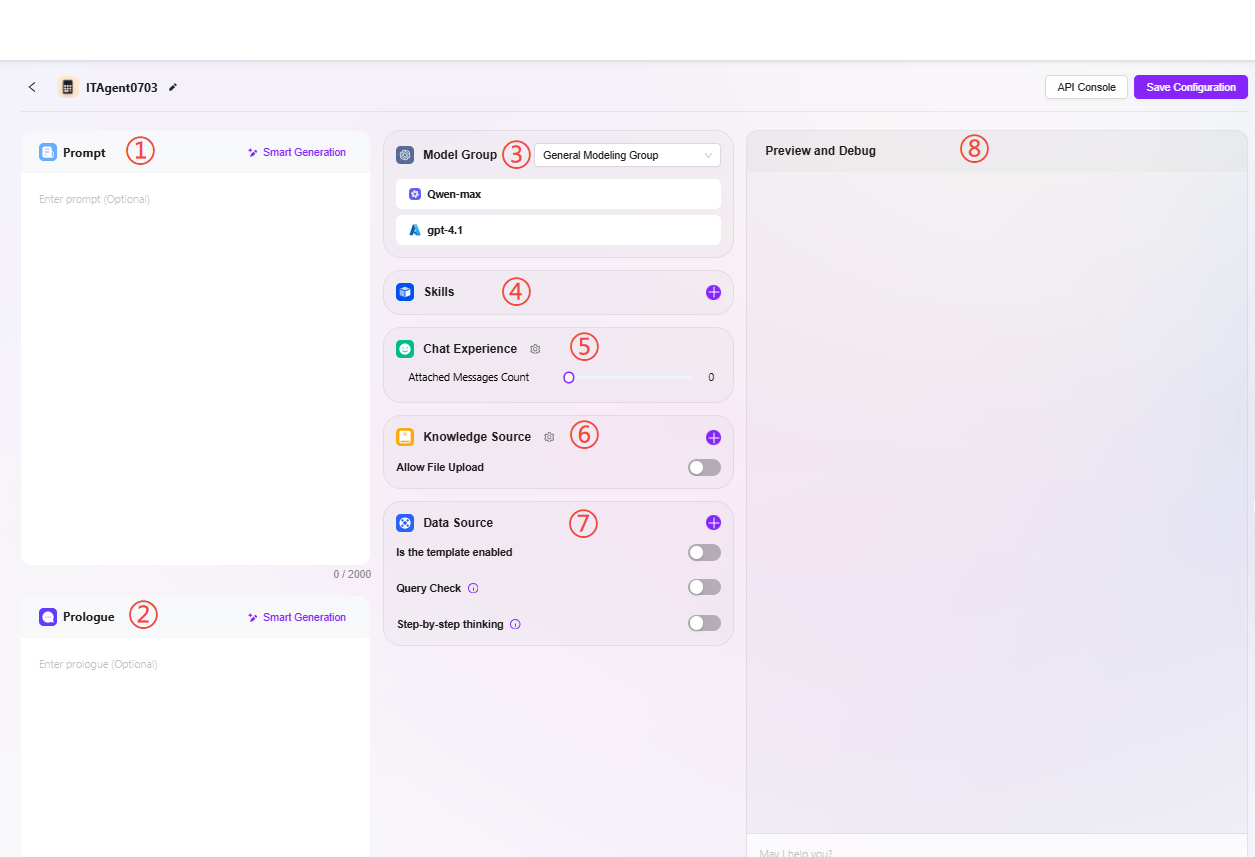
3. Agent Configuration
There are two ways to enter the Agent configuration:
- Enter the configuration page directly after creating the Agent
- Click the "..." to the right of the Agent name and select "Configure"
① Prompt: Enter the Agent's prompt. You can also use intelligent generation for existing prompts. The prompt is limited to 2000 characters.
② Opening Statement: Enter the Agent's opening statement. Intelligent generation is also supported based on the prompt or existing opening statement. The opening statement is limited to 2000 characters.
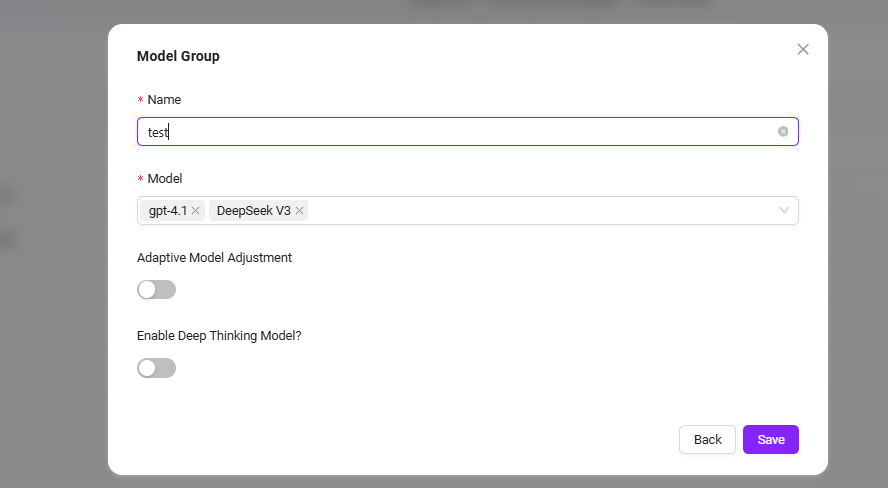
③ Model Group: Click "+" to add a model group. Multiple models are supported.
Note: Model groups must first be added by an administrator in System Management. Multiple different models can be added to the same model group, which can then be configured for the Agent.

Add Model Group
-
Path: Settings → System Management → Model Management → Model Group → New Model Group (Only administrators can add models)
-
Steps to Add:
- Click "New Model Group"
- Complete the following configurations:
- Enter the model group name
- Select the models to add to the group (multiple selections allowed)
- Choose whether to enable adaptive model deployment
- Choose whether to enable deep thinking models
- Click "Save"
④ Skills: Click "+" to add one or more skills, or add recommended skills

There are 4 default skills: Web Search, Text-to-Image, News Query Tool, Webpage Reading.
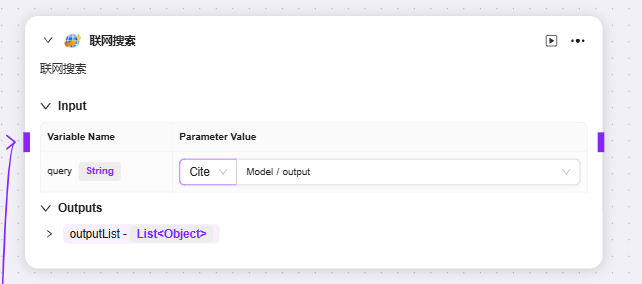
- Web Search: Connects to the internet to retrieve publicly available content (such as news, information, etc.).
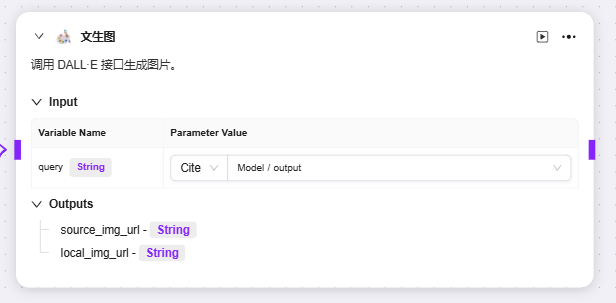
- Text-to-Image: Generates themed images based on input text.
- News Query Tool: A dedicated tool for searching and retrieving various news information.
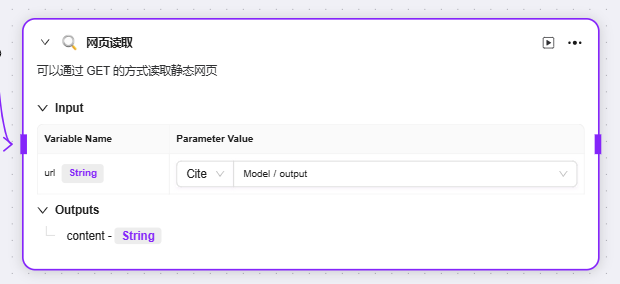
- Webpage Reading: Extracts text, data, and other content from web pages and parses webpage information.
Additional skills can be added, which require administrator operation and configuration.
⑤ Conversation Experience:
-
Conversation Settings: You can enable settings such as "User Question Suggestions, Question Guidance, Chat History, Conversation Feedback, Keyword Review", etc.
- User Question Suggestions: After the Agent responds, provides users with suggested questions based on the previous conversation.
- Question Guidance: During the conversation, relevant question guidance is provided, leveraging model capabilities to predict possible user questions and complete user queries.
- Chat History: Determines whether to retain the Agent's chat history. If disabled, chat history will not be accessible.
- Conversation Feedback: Allows users to like or dislike the Agent's responses, helping to optimize answers.
- Enable Keyword Review: At least one of input or output content review must be enabled. Once enabled, both prompts and AI feedback results will be checked for sensitive words, which can be maintained in advance. The maintenance page is shown below.
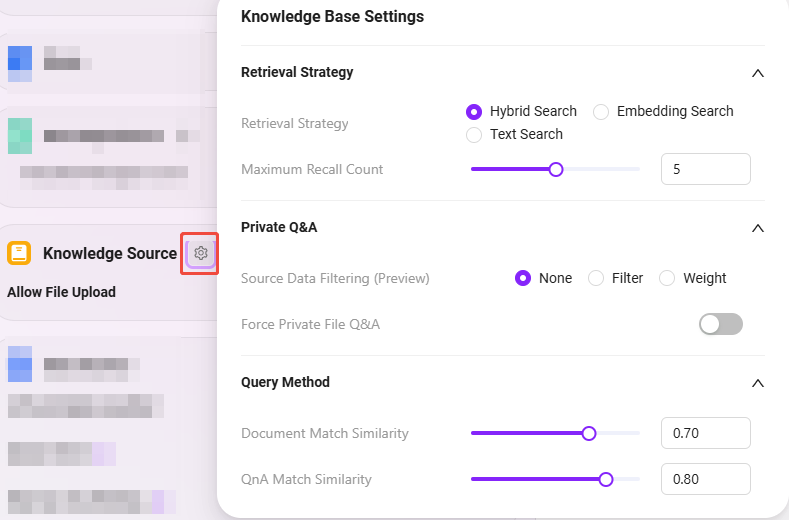
⑥ Knowledge Base:
-
Knowledge Base: Click "+" to add a knowledge base
-
Knowledge Base Configuration: You can modify detailed settings such as "Retrieval Strategy, Private Domain Q&A, Retrieval Method", etc.
- Allow File Upload:
- If enabled, you cannot add knowledge base content as a knowledge source
- If disabled, you can selectively add knowledge bases from personal or enterprise spaces as knowledge sources

- Knowledge Base Configuration:
-
Retrieval Strategy: Hybrid Search, Embedding Search, Text Search
- Hybrid Search: Combines results from vector and full-text search, returning re-ranked results
- Embedding Search: Finds segments based on similarity, with some cross-lingual generalization capability
- Text Search: Finds segments based on keywords, suitable for searches involving specific keywords or noun phrases
-
Max Recall Number: Range 1–8. It is not recommended to set this too high or too low; the suggested value is 3–5
-
Metadata Filtering: None, Filter, Weight
-
Force Private Domain File Q&A: When enabled, skills such as web search will not be used; the Agent's answers will be based solely on the knowledge base content
-
Document Match Similarity: Range 0–1. The higher the similarity, the more similar the recalled document content. The suggested value is about 0.8 (i.e., 80%)
-
QnA Match Similarity: Range 0–1, similar to document content similarity. The suggested value is about 0.9 (i.e., 90%)
-
Show References: When enabled, the Agent will list the references used in its answers, increasing answer credibility
💡 Tip: For Max Recall Number, Document Match Similarity, and QnA Match Similarity, higher or lower is not always better. It is recommended to set these according to actual needs. If there are no special requirements, keep the default values.
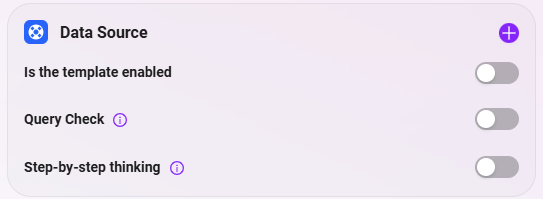
⑦ Data Sources: Click "+" to add data sources as the Agent's Q&A data source
Agent data sources can match already connected data sources and use them as reference data sources for the Agent.
Adding an Agent data source is simple: click "+" next to the data source, select the data source, and click "Confirm".
⑧ Agent Preview and Debugging: You can preview and test the Agent on the right side of the interface. Save the configuration after successful testing.
Workflow Creation - Advanced Agent
- Select "Advanced Agent" (The creation steps are the same as for a standard agent)
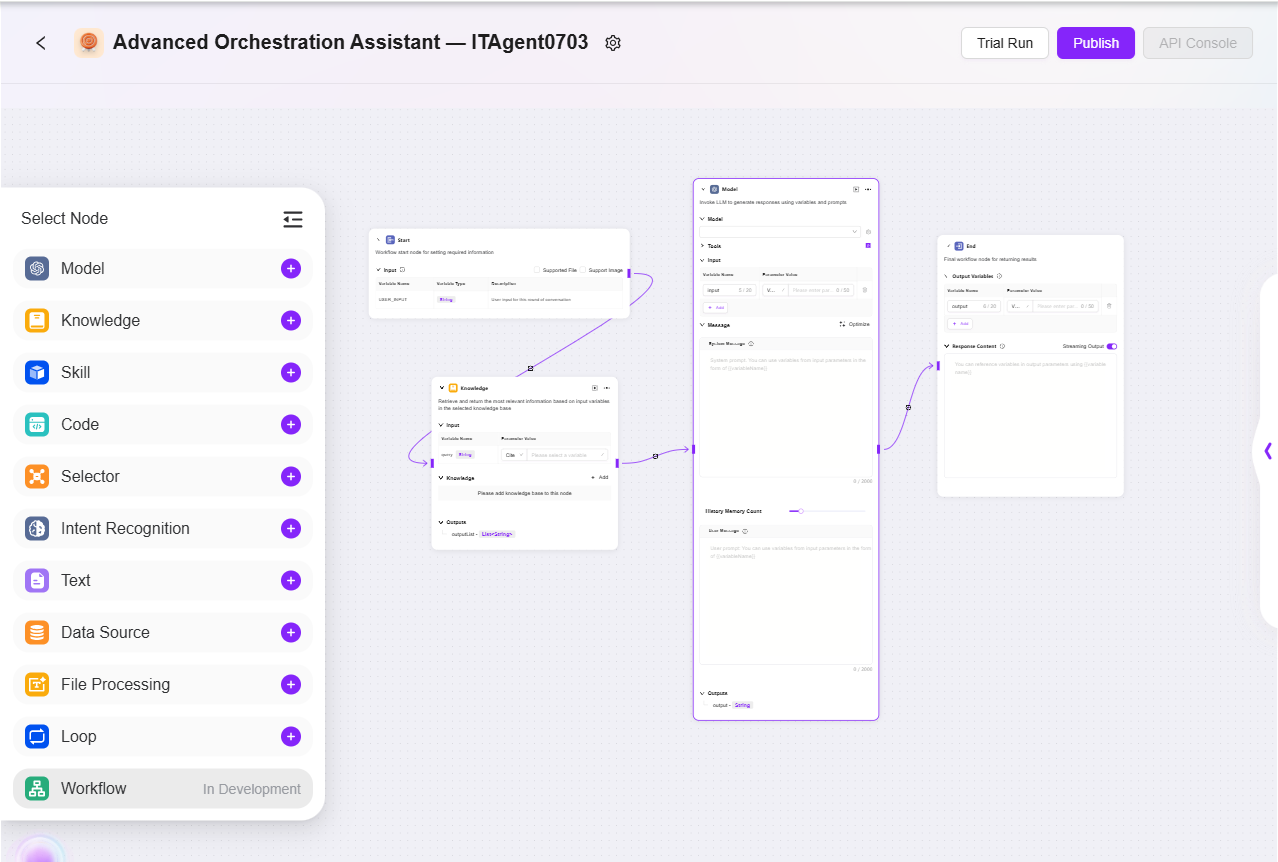
- Configure the Workflow According to Actual Business Needs:
- Start, End: Built-in input/output modules; input/output parameters and fields can be customized
- Model: Select the model to use in this module, input variables obtained from other modules, and edit prompts and output messages, saving them as variables
- Skill: Select a skill to perform input/output actions through that skill
- Data Source: Select a data source to add reference variable content
- Code: Write and create custom code functions based on output variables from other modules
- Knowledge Base: Retrieve the most relevant information from the selected knowledge base based on input variables and return it
- Selector: Connects multiple downstream branches; if a set condition is met, only the corresponding branch runs; if none are met, only the "else" branch runs
- Intent Recognition: Used to recognize user input intent and match it with preset intent options
- Text: Used to process the format of multiple string-type variables
- Detailed Node Introduction
-
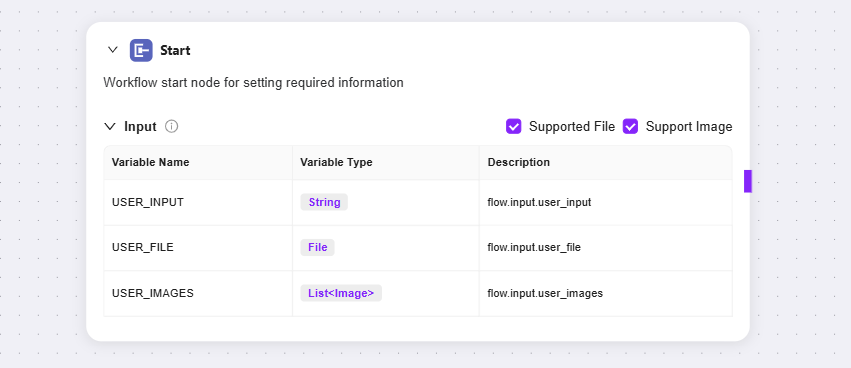
Start
-
Start Node: The starting node of the workflow, used to set the information required to initiate the workflow
-
Input: Simply put, it tells the LLM in advance what basic information (input parameters) is needed to complete a task. When in use, the LLM will remember these requirements and automatically call these preset parameters when it detects the need to start a task in the conversation, placing the parameters in the appropriate positions to initiate the entire process.
-
-
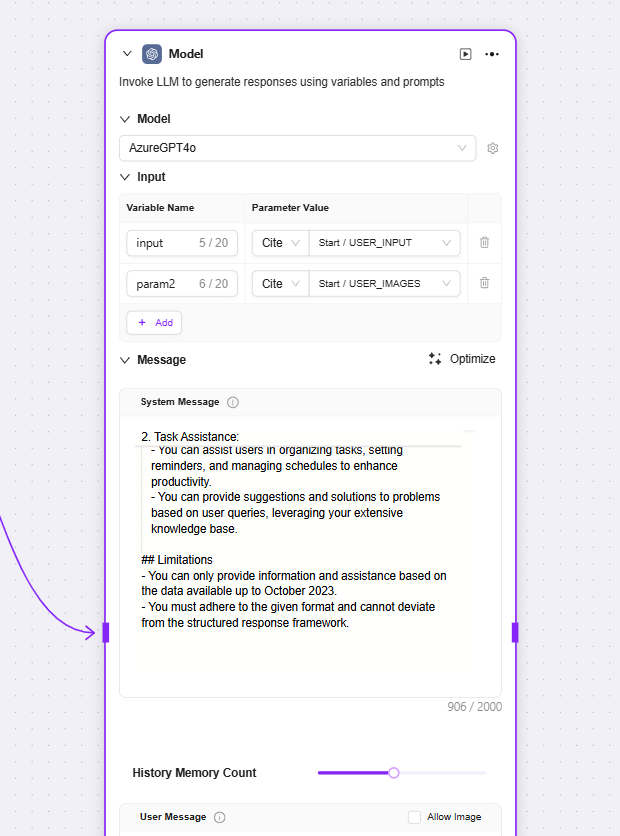
Model
-
Model: Calls the large language model to generate replies using variables and prompts
-
Input: Select an existing model from the dropdown and choose input variable names
-
Message: Provides high-level guidance for the conversation
-
User Message: Provides instructions, queries, or any text-based input to the model
-
💡 Tip: You need to connect to a preceding node before you can select variables from other nodes as input variables for the current node
-
Skill
-
Currently, three default skills can be added to advanced orchestration: Web Search, Text-to-Image, Webpage Reading
-
You can input the preceding node variables as query or URL for each skill and obtain the corresponding output variables
-
-
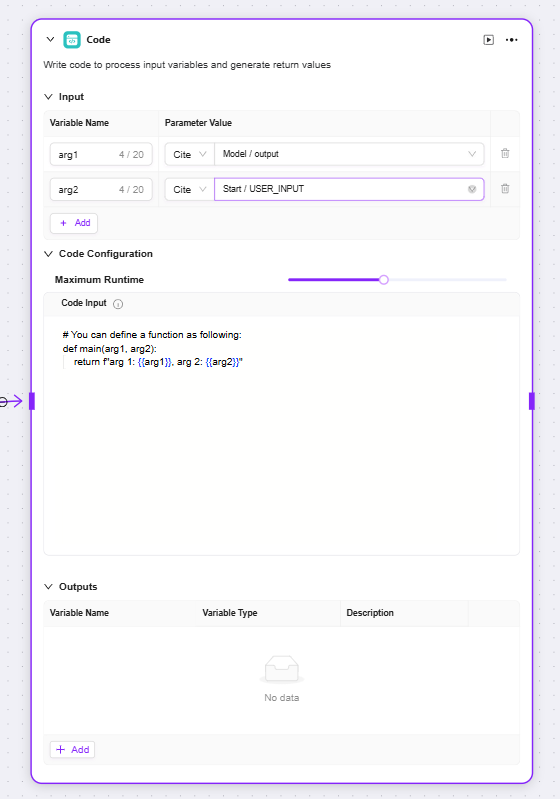
Code
-
Code: Write code to process input variables and generate return values
-
Input: Used to receive externally passed variables, serving as the entry point for data required by the code and providing raw data for subsequent code processing
-
Code Configuration: Set parameters related to code execution (such as maximum runtime) and provide a code editing area to write logic for processing input variables
-
Output: After processing the input data, the code outputs the result as a specified variable, serving as the output of the code processing result
-
-
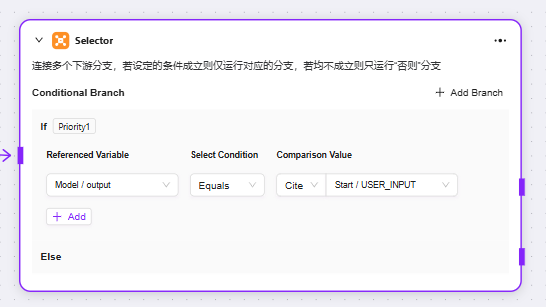
Selector
-
Selector: Acts as a conditional judgment in workflow orchestration. It connects multiple downstream branches and determines the execution path based on set conditions
-
Conditional Branch: Multiple conditions can be set, such as "if - Priority 1". By configuring referenced variables, selecting conditions (such as equals, greater than, etc.), and comparison values, you can determine whether the condition is met. If so, the corresponding branch process runs.
-
-
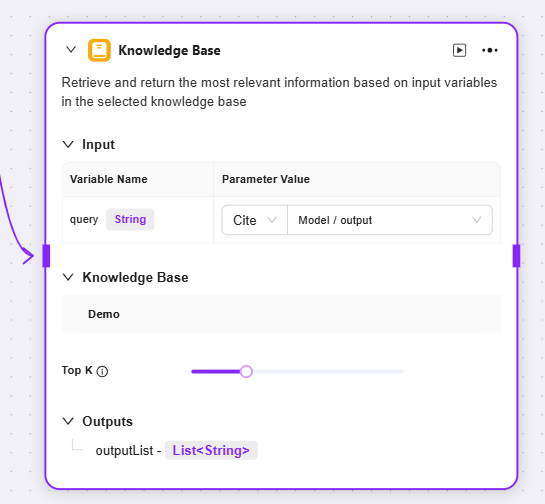
Knowledge Base
-
Input: By defining variable names and setting parameter values, provides original data such as retrieval keywords for knowledge base search
-
Knowledge Base: Select a specific knowledge base as the search scope; the system will search for matching information within this range
-
Max Recall Number: Set the maximum number of matching results to return from the knowledge base to avoid excessive data
-
Output: Outputs the matching information retrieved from the knowledge base as a specified variable for use in subsequent processes
-
-
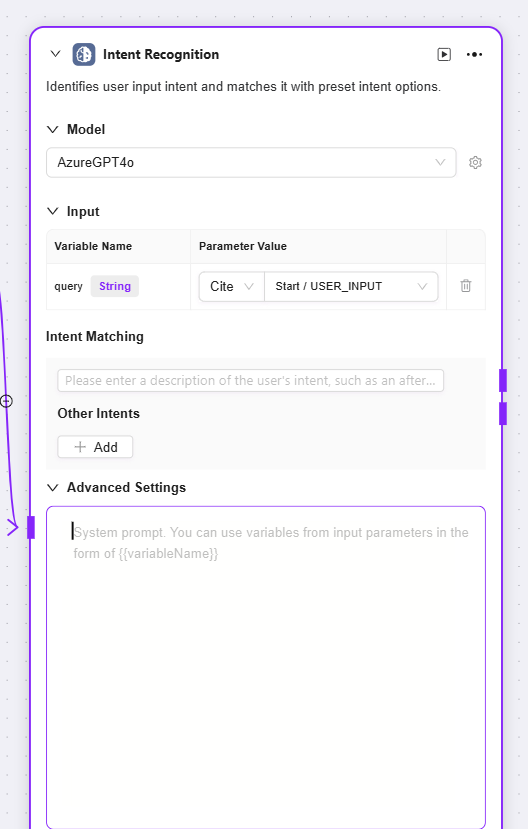
Intent Recognition
-
Intent Recognition: A key step in natural language processing, this module analyzes user input to determine their true intent and matches it with preset options
-
Model: Select the model used for intent recognition; the model determines the capability and effectiveness of intent recognition
-
Intent Matching: You can pre-enter user intent descriptions as matching criteria and add other intents. The system will determine which preset intent the user input matches
-
Advanced Settings: You can set system prompt content and reference input variables to optimize prompt effectiveness; you can also set the number of historical memory entries to allow the model to refer to past conversation information and improve recognition accuracy
-
-
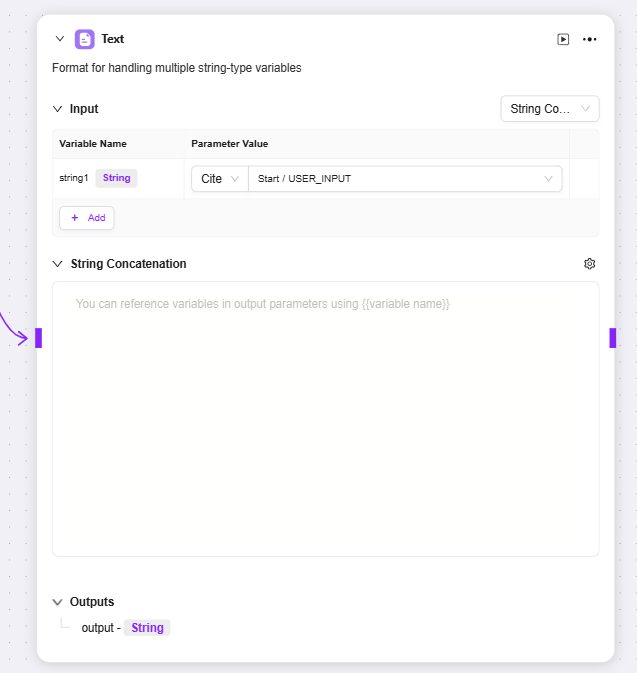
Text
-
Text: Mainly used to process the format of string-type variables
-
Input: You can define variable names and obtain parameter values by reference, providing raw string data for subsequent text processing
-
String Concatenation: Provides a text editing area where you can reference input variables by variable name and perform concatenation or other formatting operations on multiple strings as needed
-
-
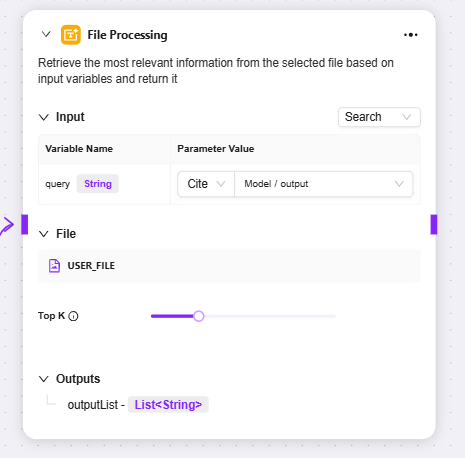
File Processing
-
File Processing: A functional module for searching and other operations on file content
-
Input: By defining variable names and referencing parameter values, provides input information such as search keywords for file content lookup
-
File: You can add files to be processed to this node to determine the file search scope
-
-
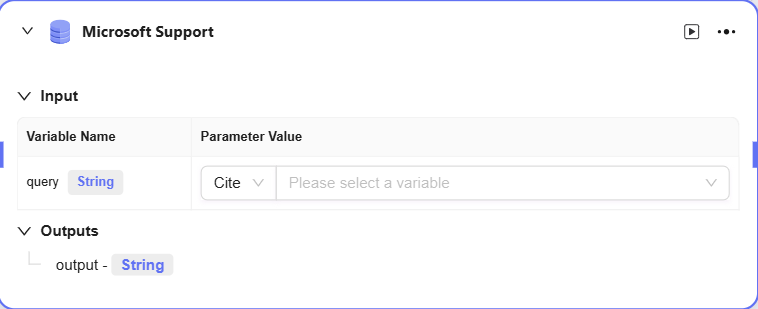
Data Source
-
Data Source: Select the data source to connect
-
Output: Outputs the data from the data source to the next node.
-

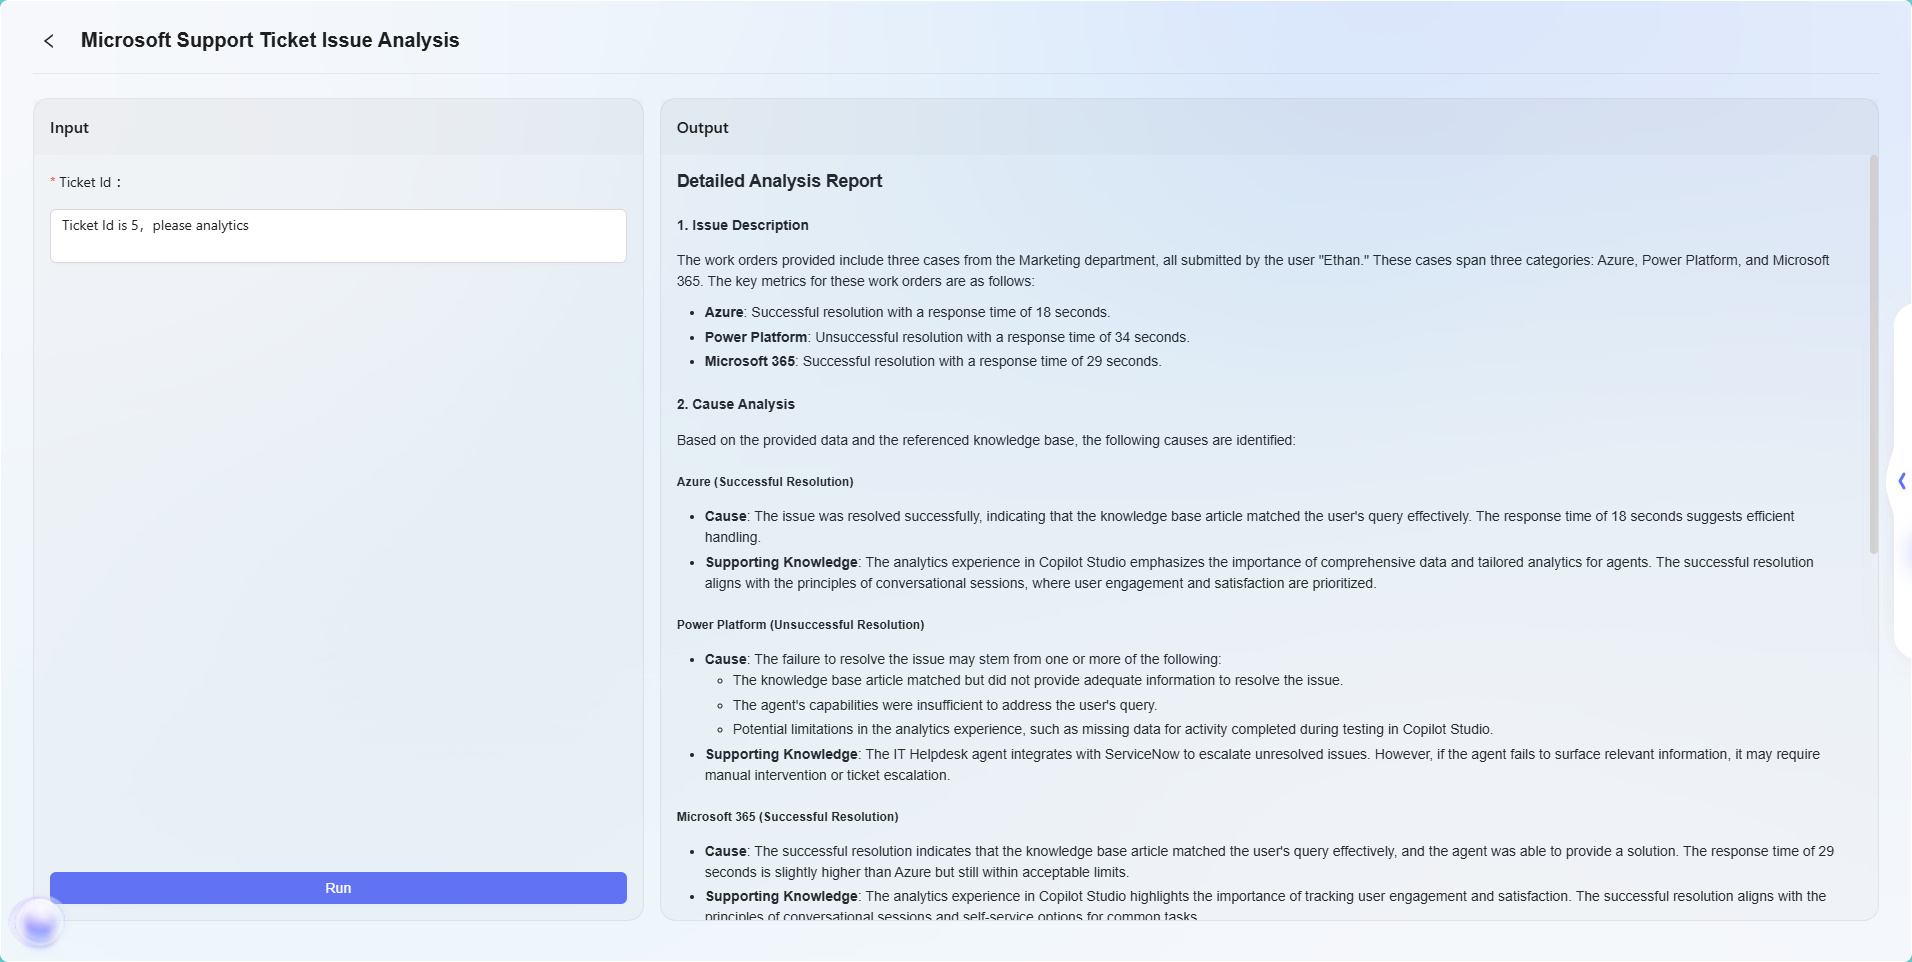
Workflow Example
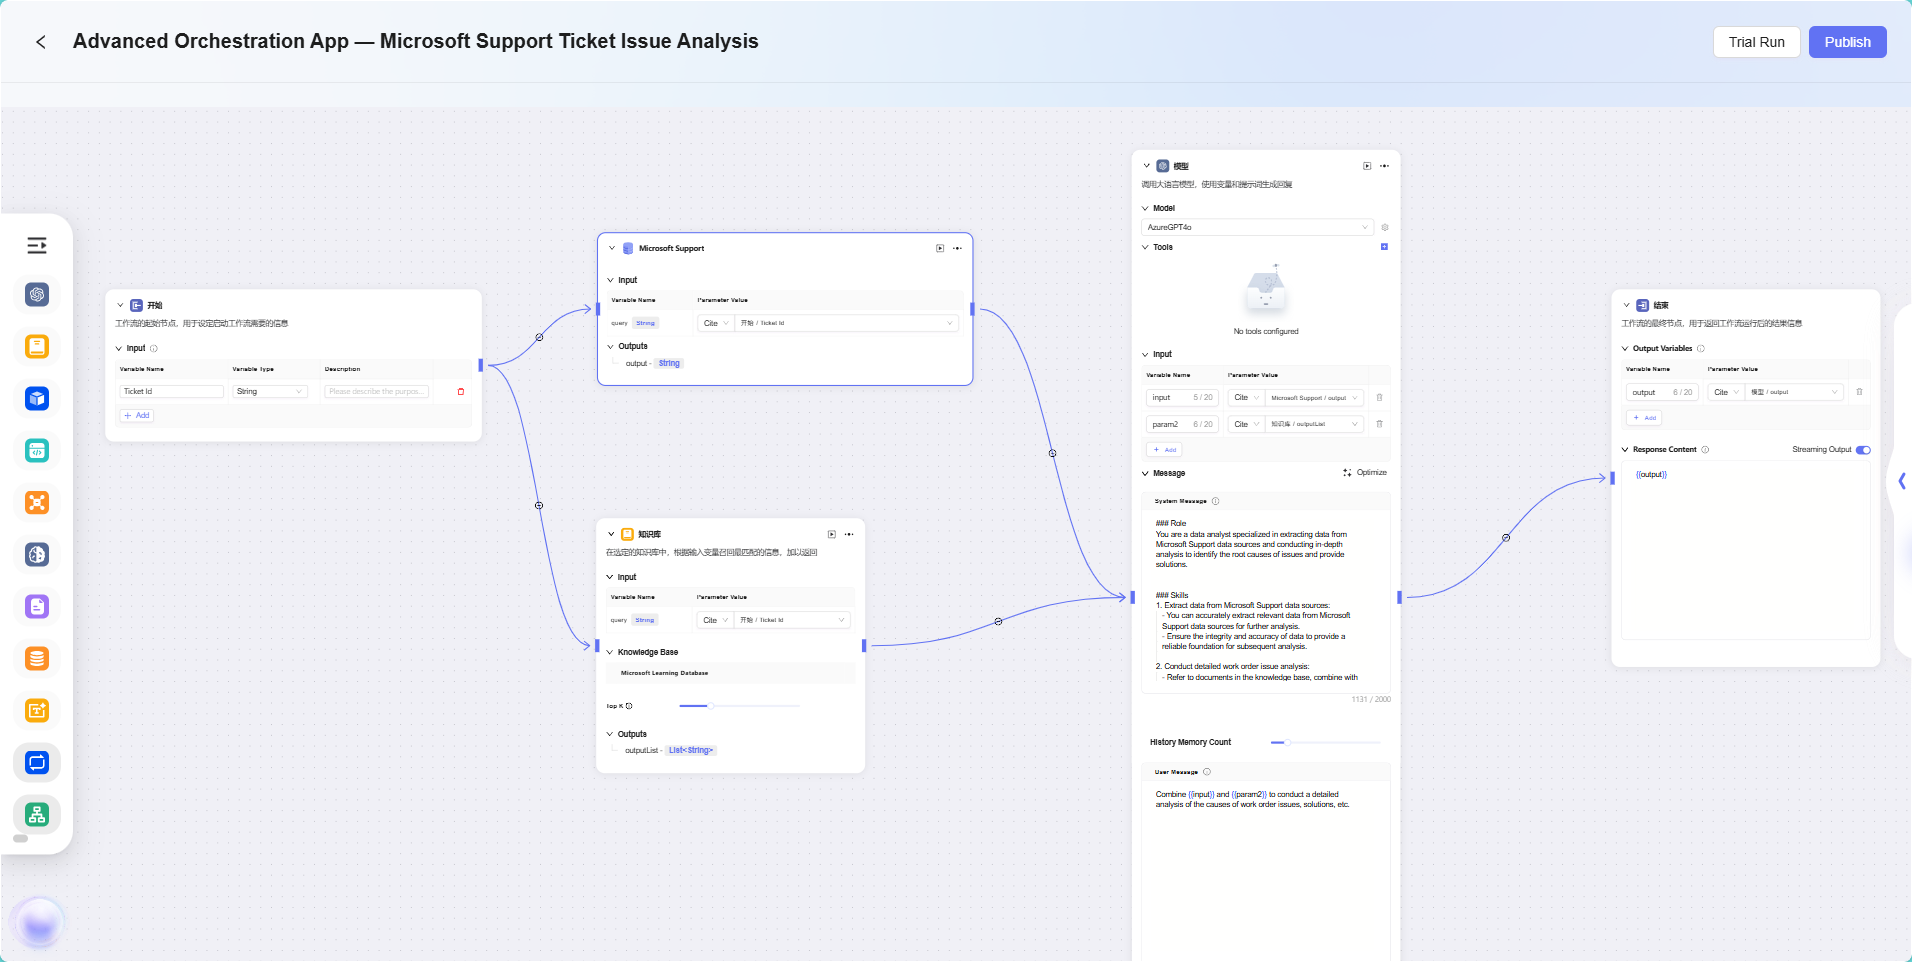
In this scenario, the workflow feature is used to build a complete "Microsoft Support Ticket Issue Analytics" process. The specific workflow is as follows:
-
Start Node
The starting point of the process, included by default. -
Data Source Node
Used to connect the raw data required for ticket analysis. -
Knowledge Base Node
Connects knowledge documents containing reference materials for analysis, serving as the theoretical support for AI analysis. -
Model Node
Based on the AI model, combines data source and knowledge base content for comprehensive analysis and generates ticket issue analysis results. -
End Node
The endpoint of the process, outputs the analysis results from the model node. This node is included by default.
The data source node and knowledge base node are configured in parallel, while the model node aggregates and processes information from both to ensure that the output results have both data support and theoretical backing.
The final effect is as follows:
Note: This example is a simple application of the advanced orchestration feature, intended to demonstrate its basic workflow effect. Advanced orchestration is highly flexible and extensible, supporting the implementation of complex business logic and intelligent automation processes through various node types, and can be widely applied in many real-world business scenarios.
Create an Agent via Share Code
Share code creation can be understood as copying an Agent. The core principle is to generate a dedicated share code from an existing mature Agent. Users only need to obtain this code to quickly create a brand new Agent, achieving seamless replication and distribution of functionality.
Steps to Create an Agent via Share Code:
- Click the three dots to the right of the Agent and select "Share"
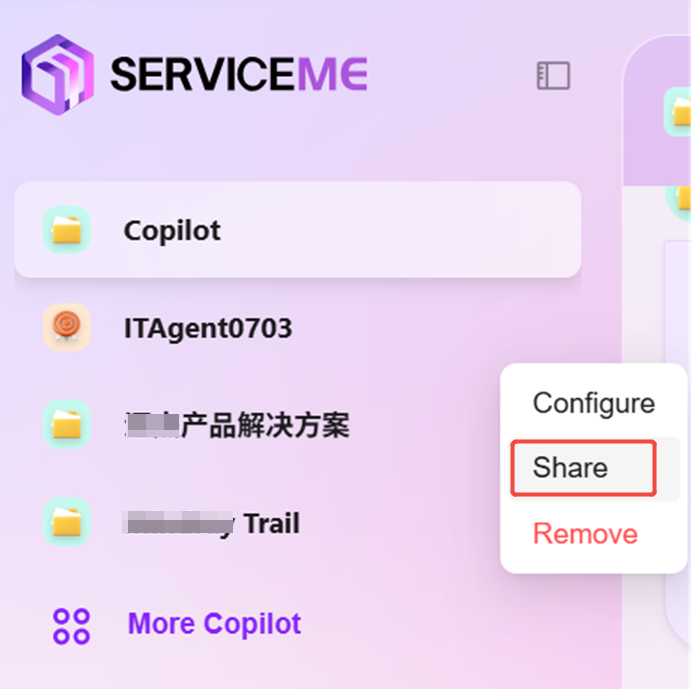
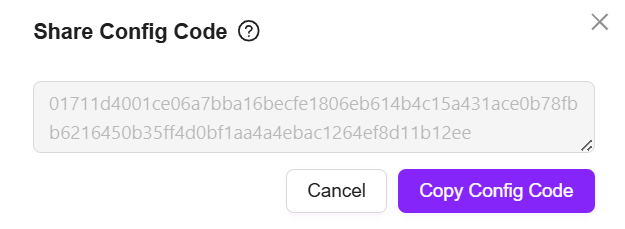
- After clicking, a configuration code will be generated. Copy the configuration code for later use
- Click "Create Agent" and select "Share Code Creation"
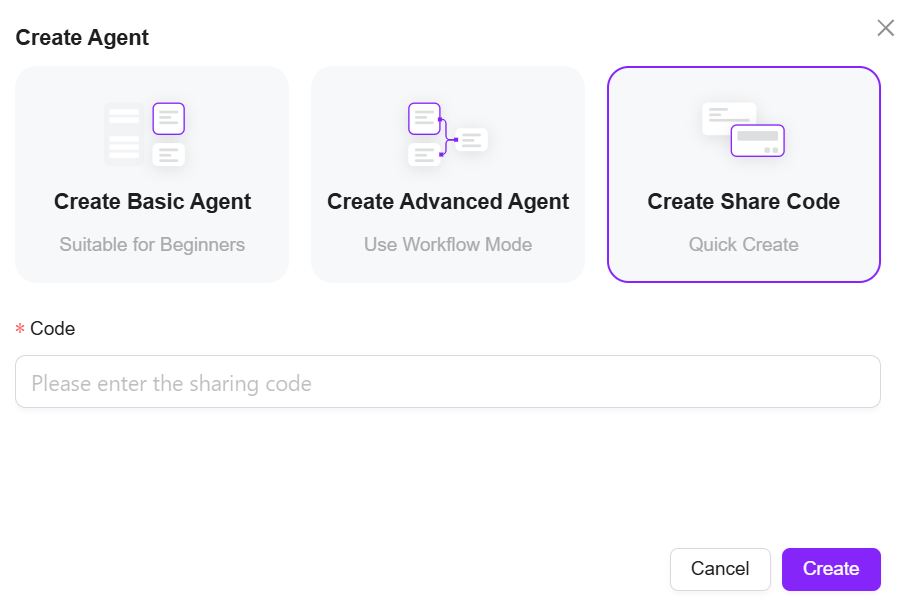
- Paste the copied configuration code into the configuration code field and click "Create"
You can make appropriate adjustments to the Agent created via share code on the Agent configuration page to better suit your scenario.